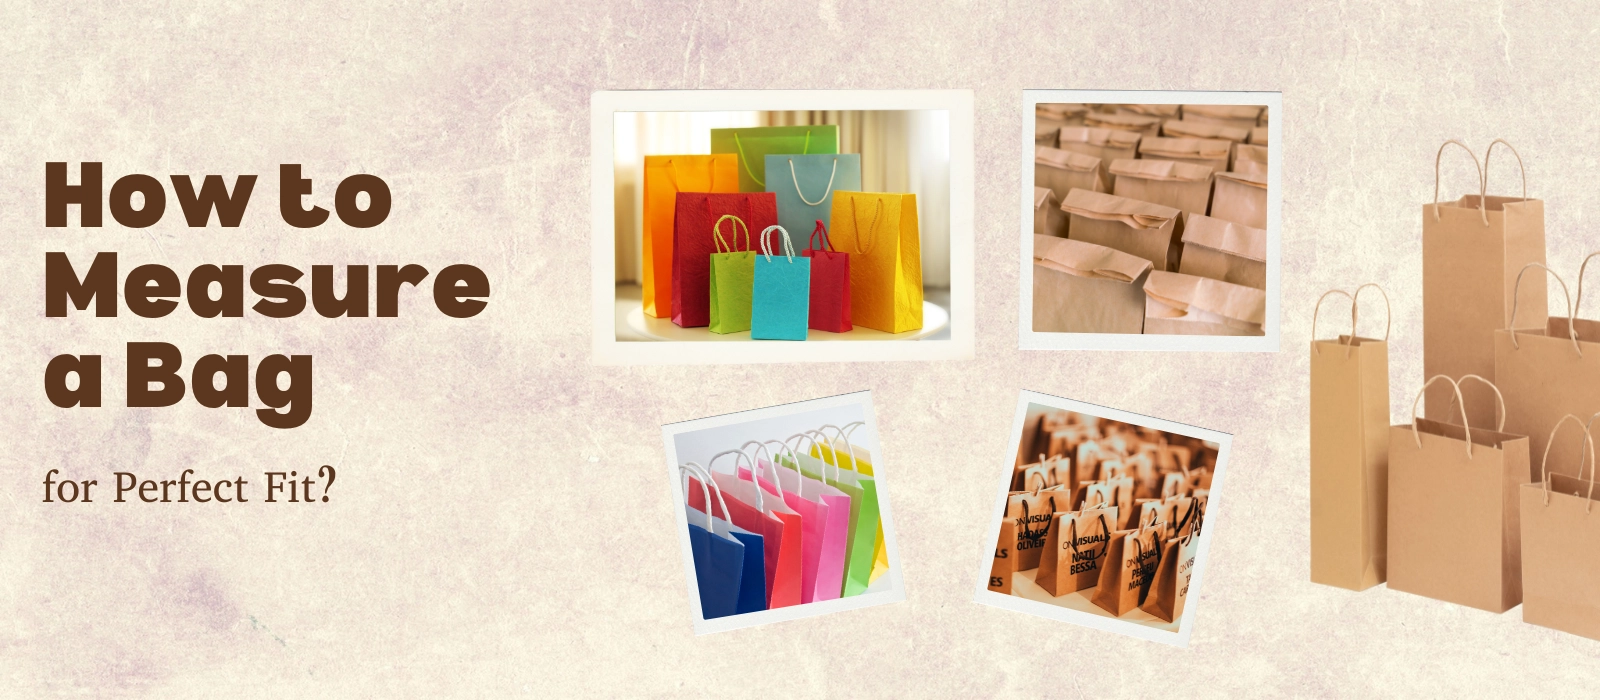
Are you tired of bags that don’t quite fit? Have you ever ordered packaging only to find it’s a few millimeters off, too tight for the product, or too loose to seal properly? Do you struggle to tell where width ends and gusset begins—or whether to include the zipper in the total height? These small mistakes lead to big losses in packaging cost, wasted materials, and customer dissatisfaction.
Here’s the short answer: measuring a bag accurately starts with knowing its type, then taking precise measurements of width, height, and gusset (or depth) on a flat surface using millimeters. Always record usable height separately from total height, and express your final spec in the correct format for that bag style—so every supplier reads it the same way.
Stay with me. I’ll walk you through the same professional process we use in our own factory—clear diagrams, industry tips, and practical formulas. By the end, you’ll know exactly how to measure a bag for a perfect fit, every time.
Understanding Bag Types and Measurements
Before you pick up a ruler, define the bag type and the language of dimensions. That avoids miscommunication and keeps quotes consistent across suppliers. I always start with six core terms: Width (W), Height (H), Gusset (G), Depth (D), Bottom Gusset (BG), and Thickness or Weight.
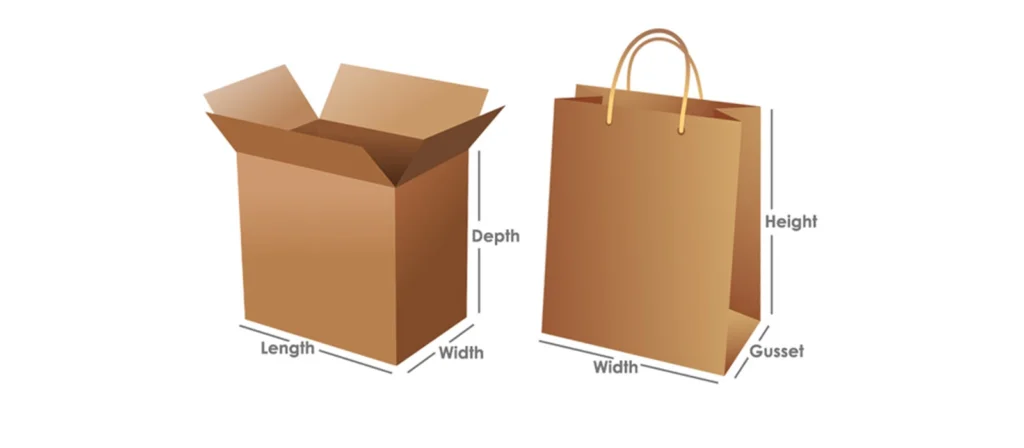
Width (W). Measured left to right across the front panel of a flat bag or pouch. For side-gusset styles, width is taken only on the front panel and excludes the folded gusset. Use millimeters for precision. A steel rule with fine graduations helps.
Height (H). Measured from the bottom seal to the top edge. Separate total height from usable height. Usable height stops at the zipper or heat-seal line, whichever limits fill. This prevents under-fills and burst seals.
Gusset (G). The side fold on bread, coffee, and many paper bags. Record one gusset depth, not both. When opened, internal depth is approximately twice the gusset value. This matters for volume and shelf fit.
Depth (D). In paper shoppers and SOS bags, depth is the side panel measurement when fully opened. It functions like the internal depth of film bags but follows paper converting terminology.
Bottom Gusset (BG). The base expansion on stand-up pouches. Measure the fully expanded base from front fold to back fold. BG controls stability and practical fill. Small errors here can cause tipping and poor shelf presence.
Thickness or Weight. For films, list caliper in microns or mils. For paper, list basis weight in grams per square meter. Film caliper affects stiffness, barrier, and seal performance. Paper weight affects crush resistance and handle load. If you quote across regions, note both units to avoid conversion mistakes.
Standard spec formats. Use the shorthand your converter expects:
- Flat bag:
W × H(for example, 200 × 300 mm). - Side-gusset bag:
W × G × H(for example, 180 × 60 × 330 mm). - Stand-up pouch:
W × H + BG(for example, 160 × 230 + 90 mm). - Paper shopper:
W × D × H(for example, 260 × 140 × 330 mm).
Where to place the tape. Always measure on a clean, flat table. Smooth the film. Align the rule inside the seal if you want internal cavity size; align edge to edge if you want total external size. State which method you used. For coffee and snack pouches, list valves, zippers, tear notches, hang holes, and spouts as separate notes, not embedded in the dimension string.
Units and rounding. Quote in millimeters to the nearest single millimeter, or use inches to the nearest sixteenth if your team works in imperial. For production, allow standard dimensional tolerances, typically three to five percent on width, height, and gusset, and around ten percent on film caliper. If artwork is involved, define live area and bleed so print remains centered within those tolerances.
In practice, this shared vocabulary prevents the common traps: counting both gussets as one number, mixing usable and total height, or quoting external dimensions when the product needs internal clearance. Get these definitions right once, and every downstream step—volume, case pack, and freight—gets simpler and more predictable.
Tools You Need to Measure a Bag
Precision starts with the right tools. I keep a compact kit on my desk and a duplicate on the factory floor. With these basics, anyone can capture repeatable dimensions in minutes.
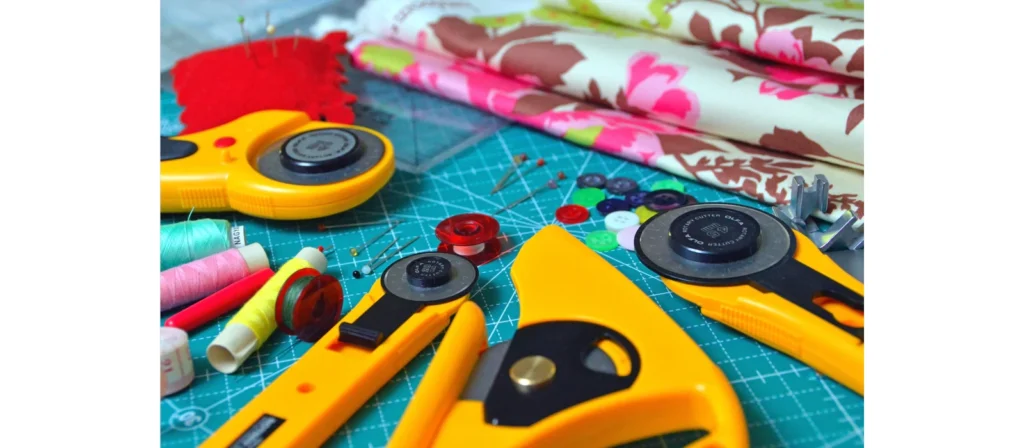
Steel ruler. Choose a rigid, non-flex steel rule with clear millimeter and inch markings. Flexible plastic bows under pressure and adds hidden error. A matte finish prevents glare under overhead lights.
Caliper. A digital caliper reads to hundredths of a millimeter. Use it for zipper height, seal widths, spout collars, valve diameters, tear-notch offsets, and hole spacing. Zero the caliper before each session. Close it gently to avoid compressing soft films.
Tailor’s tape. For large liners, trash bags, or bulky paper shoppers, a soft tape makes it easy to capture circumference and long runs. Keep the tape level and snug, not stretched.
Square or right-angle ruler. It helps you check that seals and edges are true. If a bag is skewed, your height will vary from left to right. I note any skew on the spec so converting and packing teams are aware.
Flat surface and weight. Use a clean, flat table. A small non-marring weight or paper block helps hold the bag flat without stretching it. Creases and curls are the enemy of consistent readings.
Thickness gauge. For films, a micrometer or dial thickness gauge measures caliper at multiple points. Measure near the center panel, away from seals, then near the folds. Record the average and the spread. For paper, confirm basis weight from the reel ticket and verify caliper with a feeler gauge if needed.
Scale. A compact digital scale is useful when you need to reverse-check material assumptions. Consistent bag weight across samples often signals stable material caliper and seal geometry.
Marker and notepad. I mark W, H, G, D, and BG directly on a disposable sample. Then I copy the final numbers into the spec sheet with time, date, and operator initials. This audit trail saves arguments later.
Environmental notes. Temperature and humidity change film behavior. Measure at room conditions and keep samples out of direct sun. If you must measure in a warehouse, let the sample acclimate for a few minutes.
Measurement discipline. Measure twice. Record once. If two readings differ by more than one millimeter on the same feature, measure a third time and average. For gussets, fully open the fold with your fingers, then let it relax and take the reading without tension. Never pull a zipper to force height; measure the natural lay.
Cleanliness. Wipe seals and edges. Dust and oil can build up at the folds and exaggerate thickness, especially on laminated pouches. Clean tools as you go. A lint-free cloth and a dab of isopropyl alcohol keep readings honest.
With this kit and discipline, even a mixed pile of samples becomes simple. The goal is not just a number. It is a number any supplier can reproduce on their bench, any day, with the same result.
How to Measure a Flat Bag
Flat bags are the simplest to size, but most errors I see happen here because people mix up total height, usable height, and seal geometry. My rule is simple: define the reference surface, flatten gently, and measure the exact features you want quoted.
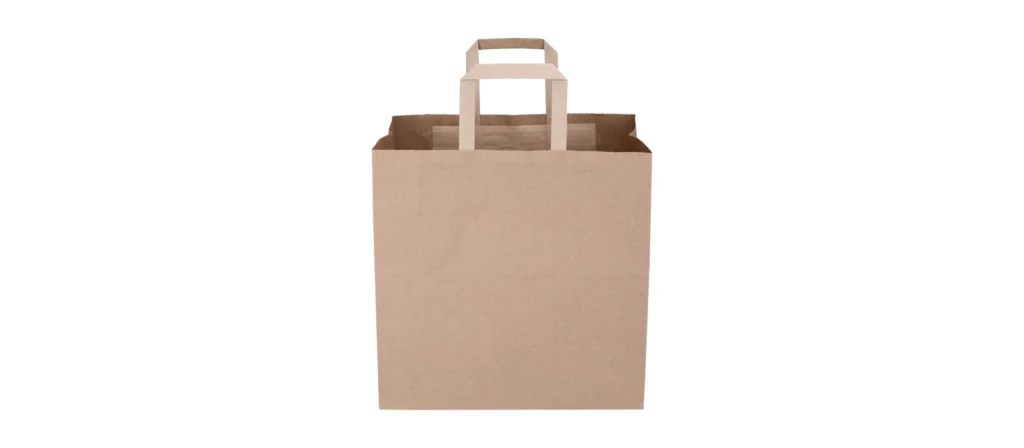
Identify the style. A flat bag has two panels and no gussets. Common examples are poly mailers, clear film sleeves, bakery liners, and small paper envelopes. If there is a header, a hang hole, or a zipper, it is still a “flat bag” in structure; you will just list accessories and usable height separately.
Prepare the sample. Lay the bag on a clean, flat table with the front panel facing up. Smooth it with your palm. Do not stretch the film or pull the zipper area taut—forced tension introduces hidden error and will not match production conditions.
Measure width (W). Place the ruler across the opening, edge to edge. Read to the nearest millimeter. If you need the internal cavity width, align the rule inside the seals and note this explicitly. If seals differ left versus right, capture both seal widths and keep your width measurement consistent to either total or internal—never mix the two.
Measure height (H). Place the rule from the bottom seal to the top edge. This is total height. Now measure usable height: from the bottom seal to the lowest limit that affects fill, typically the zipper centerline, the tear notch, or the intended heat-seal position. Record both numbers. Usable height governs real packing efficiency and is the number your operations team cares about.
Capture seal geometry. Measure bottom seal width and top hem or zipper band height. Uneven seal widths can shrink internal volume and shift artwork. I record bottom seal width, top seal/header height, and any side seal widths as separate lines on the spec.
Thickness or weight. If the bag is film, record caliper in microns or mils, measured away from seals. If paper, note gsm and, if relevant, whether it is coated or uncoated. Thickness changes stiffness and perceived quality; it also affects sealing dwell time.
Spec format. Write the spec as W × H, with an added note for usable height and features. Example: 200 × 300 mm, usable height 270 mm, bottom seal 8 mm, zipper 15 mm. If a header sits above the zipper, list header height separately instead of rolling it into H unless the buyer specifically needs total billboard height.
Quality checks. Measure three samples from the batch. If readings vary more than one millimeter, average and note the spread. Check squareness by comparing left and right edge heights; more than two millimeters of skew suggests handling or cutting variation worth flagging.
Common pitfalls to avoid. Do not include the header or hang tab in usable height. Do not measure height with the zipper forced open. Do not round aggressively—one extra millimeter in width can be the difference between a smooth insert and a wrinkled, burst seal on high-speed lines.
When you brief a supplier. Provide width, total height, usable height, seal widths, material and thickness, and any features like zipper, tear notch, or hang hole. With those few lines, your converter can price accurately and your line will run without surprises.
How to Measure a Side-Gusset Bag
Side-gusset bags look simple, yet most quoting errors come from counting both gussets as one number or accidentally including the gusset in the front-panel width. My approach is consistent: isolate each feature, measure once for understanding, then measure twice for accuracy.
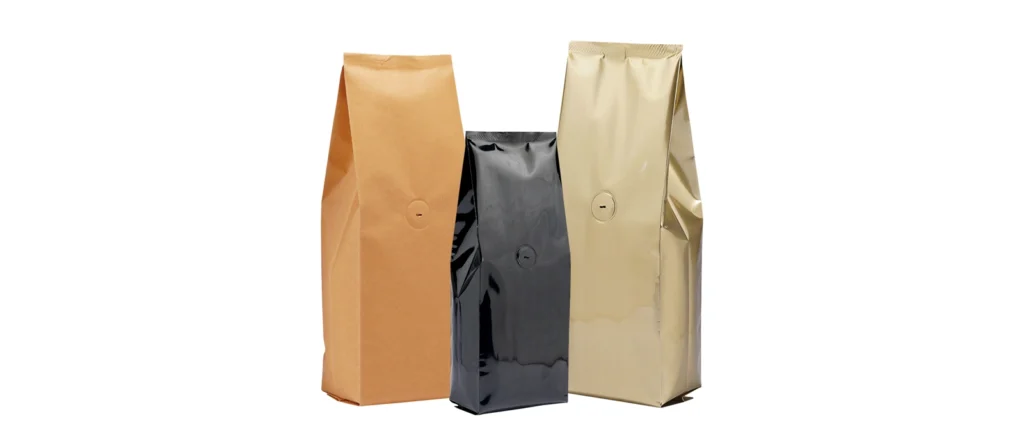
Identify the style. A true side-gusset bag has two vertical folds that create expandable sides. Typical examples include bread bags, coffee bags, and many block-bottom paper or film bags. Accessories like valves or zippers do not change the dimension logic; list them separately.
Prepare the sample. Place the bag flat on the table with the front panel up. Let the gussets sit naturally in their folds. Do not pre-open them yet. Smooth the front panel without stretching. If the material is laminated, avoid pressing hard along the seals; compression can distort readings.
Measure width (W). Measure only the front panel from left edge to right edge, excluding the folded gussets. This is the most common mistake I correct in purchase orders. If you include the gusset area, you overstate width and the finished bag wraps too loosely around the product.
Measure gusset (G). G is the depth of a single side fold when relaxed. Lift one gusset gently, open it flat with two fingers, then allow it to settle without tension. Measure from the edge fold to the inner crease. Record the value for one gusset; do not double it. When the bag is filled and opened, the internal depth is approximately 2G.
Measure height (H). Measure from the bottom seam to the top edge. If the bag has a header, zipper, tin tie, or fold-over closure, record total height and then add notes for closure type and any usable height limit. For coffee bags with valves, the valve position does not change H, but you should record its distance from the top edge for consistency in production.
Spec format. Write the spec as W × G × H. Example: 180 × 60 × 330 mm. Keep features separate: valve, zipper, tin tie length, tear notches, or degassing valve location. If you plan a block-bottom with a pre-formed base, note that construction separately; the three-number spec still applies to the body.
Fit and perimeter. A handy quick check is the filled-bag perimeter approximation: Perimeter ≈ 2W + 2G. This tells you how the bag will wrap a cylindrical or prismatic product. If you are sizing for a canister or box, compare this perimeter to the product’s circumference plus a small allowance for film thickness and sealing.
Seal geometry and stiffness. Side seals and bottom seals reduce internal width and height. Measure side-seal widths individually if they are not symmetric. If you are switching materials (for example, kraft/PE to PET/AL/PE), remember that stiffer laminates resist opening the gusset fully; in practice you may realize a usable depth slightly under 2G. Note this in your trial run rather than altering the spec.
Consistency across samples. Measure at least three bags and record W, G (left), G (right), and H. If G differs left to right by more than one millimeter, average the values and note the spread. This helps your supplier tune folding plates and tension during converting.
Common pitfalls to avoid.
- Do not report a single “gusset” as the combined depth of both sides. Quote one gusset only.
- Do not include the gusset area in W. W is front-panel width only.
- Do not fold the top down while measuring H; measure the body as supplied, then list closure style separately.
- Do not skip seal widths; seals tighten internal space and affect real packout.
Supplier brief checklist. Provide W, G, H; material structure; film caliper or paper weight; side and bottom seal widths; closure type (valve, zipper, tin tie); and any artwork alignment notes. With those details, a converter can deliver stable forming and your operations team can predict true capacity before the first run.
How to Measure a Stand-Up Pouch (Doypack)
Stand-up pouches look straightforward, yet the bottom gusset geometry often causes the biggest sizing errors. Accuracy comes from controlling three things: panel width, usable height, and fully expanded base.
Identify the style. A classic Doypack has two panels joined by a curved or plow-folded base that expands into a stable platform. Variations include K-seal bases, round-bottom, and inserted-gusset constructions. Spouts, zippers, and valves are accessories; they do not change the way we write dimensions, but they do change usable height.
Prepare the sample. Place the pouch face up on a flat table. Smooth the panel lightly without stretching. Keep the zipper closed, if present, so the top area lies naturally. Do not prop the base open during measurement; measure flat first, then open only for the base reading.
Measure width (W). Measure edge to edge across the front panel. Read to the nearest millimeter. If there are side seals on a three-side-seal pouch, note their widths separately, because seals reduce internal cavity width.
Measure height (H). Measure from the bottom seal line (not the tangent of the curved base) to the top edge. Record total height. Then record usable height up to the limiting feature: zipper centerline, spout shoulder, or your intended heat-seal band. Usable height governs real fill and seal reliability; total height governs billboard and shelf blocking.
Measure bottom gusset (BG). Open the base fully so the front and back folds stand parallel. Measure from the front base fold to the back base fold at the center. That is BG. Take two more readings near the left and right edges and confirm they match within one millimeter; if not, note the spread. On K-seal bases, measure at the center where the web is flattest.
Spec format. Write the spec as W × H + BG. Example: 160 × 230 + 90 mm. Add notes for zipper height, tear-notch offset, hang hole position, and spout type/neck size. Do not bury these in the dimension string.
Volume and headspace. For quick estimation, internal liters are often approximated by: V ≈ W × BG × k × H, where k is a shape factor. A practical k for many retail pouches is around 0.6 to 0.7. Always include headspace for sealing and product flow; granular products need more headspace than liquids with spouts.
Seal geometry. Measure bottom seal band width separately from BG. The seal band does not contribute to internal height and slightly reduces base flexibility. Record side-seal widths and zipper band height; these affect artwork and functional clearance for scoops or valves.
Stability check. With the pouch filled to your target weight, the center of mass should sit above the midline of BG for a stable stand. If topple occurs, increasing BG by 5–10 mm often solves it faster than increasing W or H.
Common pitfalls to avoid.
- Measuring BG while the base is only partially opened.
- Using the bottom curve tangent as the height origin; always use the seal line.
- Counting zipper height inside usable height.
- Ignoring side-seal and zipper bands when planning artwork.
Supplier brief checklist. Provide W, total H, usable H, BG, side- and bottom-seal widths, zipper type and height, spout spec if any, and material/thickness. With those details, forming tools, zipper applicators, and pack-off settings align quickly and repeatably.
How to Measure Paper Shopping Bags
Paper shopping bags look familiar, but precise sizing depends on three independent axes and a few construction details that are easy to miss. I separate dimensions from handle data and board reinforcements so the quote is crystal clear.
Identify the style. Most retail shoppers are SOS (self-opening square) or pinch-bottom variants with side gussets and a glued flat base. Handle options include twisted paper, flat paper, cotton rope, or ribbon. Some are handleless with a punch handle. The measuring logic is the same.
Prepare the sample. Stand the bag on a flat table, then gently press it flat without crushing the base. Keep the side gussets neatly folded. If a bottom board is present, confirm it is seated properly before measuring.
Measure width (W). Width is the front panel left to right. Record to the nearest millimeter. Do not include the side gusset in this number. If the bag has edge rollovers or turn-tops, those affect height, not width.
Measure depth (D). Depth is the side gusset when fully opened. To confirm, open the gusset slightly to visualize the full side panel, then flatten again and measure the fold-to-fold dimension. This value sets how far the bag accommodates thicker or boxed items.
Measure height (H). Height is the bottom to the top edge. If there is a turn-top (the paper is folded inward at the rim), measure to the external top edge, not the internal ledge. Record total height. If the buyer wants the effective internal drop below the turn-top, list that as a separate note.
Handle data. Record handle type, material, and handle drop (the distance from top edge to top of the loop at rest). For riveted or knotted handles, also note the center-to-center spacing of the holes and their offset from the top edge. Handle geometry does not change W × D × H but it governs user comfort and load distribution.
Bottom board and rim. If a bottom board is used, record its board size (width × depth) and thickness. For turn-top rims, record the turn height. These parts stiffen the bag and influence stacking and shelf presentation.
Paper weight and finish. State gsm for the body sheet and, if different, for the turn-top and handles. Coated, laminated, or varnished finishes increase scuff resistance and moisture tolerance. If the bag must carry heavier loads—wine, books, or boxes—pair higher gsm with reinforced rim patches and a thicker bottom board.
Spec format. Write the main spec as W × D × H. Example: 260 × 140 × 330 mm. Then list, on separate lines: handle type and drop, paper gsm, bottom board size and thickness, turn-top height, and any print/finish notes. Keep these outside the dimension string to avoid misreads.
Tolerances and squareness. Paper converting tolerances of three to five percent on dimension are typical. Check squareness by comparing left and right heights and verifying base diagonals. If one diagonal is consistently longer, note the skew; it can influence how cartons fit and how the bag presents at retail.
Load and practicality. A bag’s real-world load capacity is the product of gsm, handle construction, glue pattern, and bottom board stiffness. If you are sizing for a specific payload, share the target weight, the item shape, and whether the bag must survive humidity or short rain exposure. Often, a small increase in D or a stronger bottom board delivers more reliability than adding height.
Common pitfalls to avoid.
- Rolling handle drop into height; always list handle drop separately.
- Measuring depth without opening the gusset to confirm the true side panel.
- Ignoring turn-top height when internal clearance is tight.
- Forgetting bottom board size and thickness on premium or heavy-load shoppers.
Supplier brief checklist. Provide W, D, H; paper gsm; finish; handle type and drop; hole spacing and offsets if applicable; bottom board size and thickness; and print details. With those, your converter can lock tooling, glue patterns, and packing plans with minimal back-and-forth.
Conclusion
Measure the bag by type, capture width, height, and gusset or depth in millimeters, separate usable height, and state the spec in the correct format. If you want a quick sanity check, share your numbers with me. At Million Pack, we turn precise specs into consistent, production-ready packaging.

